Список заданий (челленджей) в risk of rain 2
Содержание:
Skills
Passive
| Type | Passive |
|---|---|
| Description | Holding the Jump key causes the Artificer to hover in the air. |
| Notes | |
|
On the Switch version, ENV suit can be changed to a toggle. |
Primary
| Type | Primary |
|---|---|
| Cooldown | 1.3s |
| Proc Coefficient | 1.0 |
| Description | Fire a bolt for 220% damage that ignites enemies. Hold up to 4. |
| Notes | |
|
| Type | Primary |
|---|---|
| Cooldown | 1.3s |
| Proc Coefficient | 1.0 |
| Description | Fire a bolt for 220% damage that explodes in a small area. Hold up to 4. |
| Notes | |
|
Secondary
| Type | Secondary |
|---|---|
| Cooldown | 5s |
| Proc Coefficient | Explosion: 1.0Sparks: 0.3 |
| Description |
Stunning Interrupts enemies and briefly stuns them. |
| Notes | |
|
| Type | Secondary |
|---|---|
| Cooldown | 5s |
| Proc Coefficient | 1.0 |
| Description |
Freezing Freeze enemies in place. Frozen enemies are instantly killed if below 30% health. |
| Notes | |
|
Utility
| Type | Utility |
|---|---|
| Cooldown | 12s |
| Proc Coefficient | 1.0 |
| Description |
Freezing Freeze enemies in place. Frozen enemies are instantly killed if below 30% health. |
| Notes | |
|
Special
| Type | Special |
|---|---|
| Cooldown | 5s |
| Proc Coefficient | 1.0 |
| Description | Burn all enemies in front of you for 1700% damage. |
| Notes | |
|
| Type | Special |
|---|---|
| Cooldown | 8s |
| Proc Coefficient | 1.0 |
| Description |
Stunning Interrupts enemies and briefly stuns them. |
| Notes | |
|
Sacrifice
Больше нет сундуков. Улучшения вываливаются из монстров.
Это значит, что бессмысленно бегать по карте в поисках чего-то. Это значит, что бессмысленны деньги и они нам вовсе не понадобятся. Это значит, что прощайте дроны и апгрейды для дронов нам не понадобятся.
Это также значит, чтобы достать больше сундуков — нам нужно больше монстров за более короткое время, то есть как можно быстрее активировать телепорт, перейти на след уровень и активировать телепорт там, либо перестреливать всех монстров что попадаются в зону видимости
Чтобы получит артефакт — необходимо на уровне с лавой активировать 3 кнопки, разбросаны по разным частям карты. Кнопки находятся за стеной и могут быть активированы взрывной волной от способностей, например, бандита, или енфоймера
Голосование
Это был абсолютно невероятный год с момента запуска Risk of Rain 2 в ранний доступ. Трудно поверить, что наше следующее обновление вкинет эту версию 1.0 в игру. Мы думали о том, как лучше всего сказать” спасибо » этому сообществу. Нам очень нравятся отзывы, предложения и сообщения об ошибках, которые вы предоставляете. Нет никаких сомнений, что игра стала лучше из-за ваших мыслей в Twitter, Discord и других местах
Для обновления 1.0 мы хотим дать вам важное решение, которое вы должны принять в отношении следующего выжившего персонажа игры
Есть еще шесть выживших RoR, которые не попали в продолжение «фильма». На следующей неделе вы можете отправиться в наш Дискорд и проголосовать за то, кто из этих шести выживших (или совершенно новый выживший) должен быть в обновлении Risk of Rain 2 1.0. Вы выберите материал, а я за вами прослежу. (другого перевода не нашел)
Вот как будет работать голосование выживших:
- С 31 марта, 10:00 утра CT по 7 апреля 10:00 утра CT, проголосуйте в Discord за нового персонажа, которого вы хотели бы видеть добавленным в игру.
- Мы разместили сообщение в #character-poll, в разделе «Опрос» Discord, где вы можете проголосовать, используя одну из семи реакций, которые мы построили специально для голосования выживших.
- Как только голосование завершится, мы поделимся победителем уже на следующий день, 8 апреля.
Реакции диссонанса не отображают должным образом прошлые 5000 взаимодействий, поэтому мы сотрудничаем непосредственно с Discord, чтобы гарантировать, что у нас есть правильные подсчеты голосов на бэкэнде.
Чтобы уверенно осуществить эту идею, мы работали над тем, как именно каждый из этих выживших будет переводиться из 2D в 3D. мы написали небольшой пример того, как они оживут, чтобы помочь вам сделать правильный голос!
Легендарный сундук

Abyssal Depths имеет 100% шанс появления легендарного сундука. Этот сундук будет довольно дорогим, но всегда будет содержать легендарный (красный) предмет. Сундук находится в центре карты.
Ищите ровную площадку с группой столбов. Внутри группы столбов будет выдолбленное пространство, содержащее сундук. Это будет стоить в 16 раз больше, чем маленький сундук, поэтому, если вы играете в режиме Monsoon или собираетесь некоторое время, ожидайте, что это будет стоить много денег. Легендарный предмет будет случайным, но с Artifact of Command вы можете выбрать, какой из них хотите.
Сундук всегда будет появляться здесь, поэтому, как только вы узнаете, где он находится, вы можете возвращаться каждый раз, когда появляетесь в Abyssal Depths. Однако появится только один сундук, поэтому, если вы играете с группой друзей, только один человек сможет получить легендарный предмет.
Рекомендуем ознакомится с другими гайдами на популярные игры tattoo-mall.ru. Расскажем про секреты и хитрости, которые можно использовать в играх со своей выгодой. А также про полезные и интересные историй в видеоиграх.
Version History
- Early Access Artifacts Content Update
- Major Content
| Monsters |
|---|
| Normal |
| Alloy Vulture • Beetle • Beetle Guard • Bighorn Bison • Brass Contraption • Clay Templar • Elder Lemurian • Greater Wisp • Hermit Crab • Imp • Jellyfish • Lemurian • Lunar Chimera (Exploder) • Lunar Chimera (Golem) • Lunar Chimera (Wisp) • Lesser Wisp • Mini Mushrum • Parent • Solus Probe • Stone Golem • Void Reaver |
| Boss |
| Beetle Queen • Clay Dunestrider • Grandparent • Grovetender • Imp Overlord • Magma Worm • Overloading Worm • Scavenger • Solus Control Unit • Stone Titan • Wandering Vagrant |
| Alloy Worship Unit • Artifact Reliquary • Aurelionite • Mithrix • Twisted Scavenger |
Adaptive Chest
An Adaptive Chest costs twice as much as a Small Chest and can only spawn from the third stage onward. When interacted with, the center portion raises up to reveal a small compartment, which displays and cycles through items at an accelerating rate. Any item can appear in this cycle, including items and , at around the same frequency as a Small Chest. Interacting with it again will drop the item currently shown in the cycle. Allowing it to cycle for a long enough period of time will cause it to drop a random item, and the player will not have a chance to choose.
Base cost: $50
Pausing the game in singleplayer will also pause the rotation of items in an Adaptive Chest. Therefore, the player can pause and unpause until they find their desired item and spam Interact upon unpausing again.
Item chances:
- Common = 63.06%
- Uncommon = 27.03%
- Legendary = 0.9%
- Equipment = 9.01%
Multishop Terminal
A Multishop Terminal features a choice of three items to buy, costing the same as either a Small Chest or a Large Chest, depending on the rarity. After buying one item, the other items are locked and cannot be obtained from that Terminal anymore. A question mark indicates that the item in the corresponding slot will be a random item of that rarity.
Multishop Terminals that spawn on Wetland Aspect and Abandoned Aqueduct will sometimes sell items, while ones that spawn on Abyssal Depths, Siren’s Call and Sky Meadow will always sell Uncommon items.
The base cost for a common Multishop Terminal is the same as a Small Chest, and uncommon is the same as a Large Chest.
Описание гайда
Данное руководство расскажет вам сюжет и теории такой игры как Risk of Rain 2 (RoR 2, Риск оф Рейн 2).

Обратите внимание! Есть новички или люди, которые не играли в первую часть, которые даже не знают лора игры Risk of Rain! Да-да, он есть, но он очень маленький, да простенький, и в этой игре он не сильно нужен! Если смотреть поверхностно, то он очень легкий и понятный. Если просматривать лог буки и внимательно вникать в них, то сюжет весьма загадочен! Как по мне — не все люди вглядываются в описание предметов, там много чего рассказывается: Что происходит за кулисами, история персонажей и еще куча всего
Сейчас я вам расскажу про него, ну, попытаюсь. Данная информация несет в себе спойлеры, и если вы не прошли игру, то вам не стоит читать, но а тем, кто остался, я могу лишь предложить взять чай и окунутся в эту историю!
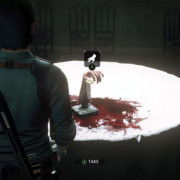
Skills & Behavior
The Reliquary is immune to all normal forms of damage. To defeat it, the player must interact with it while carrying an Artifact KeyA stone shard with immense power.. Doing so consumes all Artifact Keys, deals 1/4 damage to the Reliquary, and causes it to emit a shock wave that pushes nearby players and flying enemies a considerable distance.
Once the Reliquary is given the first Artifact Key, Monsters begin to spawn and the Reliquary begins firing lasers in a set pattern around itself to attack, which home in on any nearby player. Its fire rate increases the lower its HP becomes, and its lasers become faster and gain stronger homing capabilities.
Enemies will drop the second, third, and fourth keys, which must each be taken to the central sphere. When the fourth key is turned in, the sphere will be destroyed, and upon retrieving the artifact within the Reliquary, a portal will open to bring the player to the next stage.
Command
Больше нет рандомных предметов
Отличная новость для нас. Теперь мы сами можем выбрать себе нужный нам предмет из разряда редкости. Это значит, что мы сами можем планировать стратегию под каждый нужный случай.
Это значит, что собрать сердце и 7 зубов теперь не составит трудности.
Единственное — во время выбора предмета игра не ставится на паузу, то есть герой становится уязвим для монстров, по этому — думайте быстрее, или планируйте заранее.
Артефакт может быть найден на уровне hive cluster в верхнем правом углу, есть невидимые канаты. Цепляясь за них — вы с легкостью доберетесь до артефакта.
Главный контент
Система UI
Это то, чего мы с нетерпением ждали с момента запуска Раннего доступа. В первую очередь мы хотели улучшить визуальный интерфейс и, наконец, избавиться от экранного курсора для пользователей геймпада. Есть около миллиона изменений с этим изменением. Кто-нибудь просил об этом? Нет. Это заняло много времени? Да. Стоило ли? Нет. Я пишу примечания к патчу? Да. Это наверху, так что вы должны прочитать это? Да.
6 предметов и 2 снаряжения
- Repulsion Armor Plate.
- Squid Polyp.
- Death Mark.
- Interstellar Desk Plant.
- Sawmerang.
- Recycler.
- Focused Convergence.
8 записей в игру
- Repulsion Armor Plate.
- Squid Polyp.
- Death Mark.
- Interstellar Desk Plant.
- Sawmerang.
- Recycler.
- Focused Convergence.
- Ghor’s Tome.
Receiving Damage
This page refers to content that has possibly been invalidated by recent game patches. While the values and attributes might still be correct, they will need to be re-validated.
This procedure is used for players and enemies alike.
The game begins by creating a copy of the incoming damage amount. We’ll call this new copy ‘amount’, whereas we’ll call the old damage ‘original amount’.
- If the target has succeeded the roll for Tougher TimesChance to block incoming damage.15% (+15% per stack) chance to block incoming damage. Unaffected by luck., has just spawned in, or is otherwise invincible, set the damage rejected flag and stop applying any further damage.
- If the attacker has CrowbarsDeal bonus damage to enemies above 90% health.Deal +75% (+75% per stack) damage to enemies above 90% health. and the target is above 90% of their maximum combined health, multiply amount by .
- If the attacker has Armor-Piercing RoundsDeal extra damage to bosses.Deal an additional 20% damage (+20% per stack) to bosses. and the target is a , , or Horde of Many, multiply amount by .
- If the attacker has a Focus CrystalDeal bonus damage to nearby enemies.Increase damage to enemies within 13m by 20% (+20% per stack). and is within 13 meters of the target, multiply amount by .
- If the hit was a critical hit, multiply amount by 2.
- If the damage doesn’t bypass armor (such as damage from a Shrine of Blood), apply the armor reduction/increase to amount. This can’t reduce amount to less than 1.
- If the target is a player and amount is greater than 90% of the character’s combined health, reduce the amount to 90% of the target’s combined health instead. This is commonly known as One-Shot Protection or OSP for short.
- If applicable, apply certain slows and roots to the character based on the damage type.
- If the target has any Brittle CrownsGain gold on hit… BUT lose gold on getting hit.30% chance on hit to gain 2 (+2 per stack) gold. Scales over time.Lose gold on taking damage equal to 100% (+100% per stack) of the maximum health percentage you lost., take away money equal to the maximum between and .
- Reduce the target’s barrier by amount, and amount by the barrier actually removed.
- Reduce the target’s shield by amount, and amount by the shield actually removed.
- Reduce the target’s health by amount. If this would reduce their health below 1 and the damage is of the nonlethal type, such as Helfire Tincture45sBurn everything nearby… including you and allies.Ignite ALL characters within 15m for 12s. Deal 5% of your maximum health/second as burning to yourself. The burn is 0.5x stronger on allies, and 24x stronger on enemies. self-damage or fall damage, set their health to 1 instead.
- Apply knockback.
- (There’s possibly a few steps in between here that this editor has not exactly traced to their entire conclusions.)
- If the target isn’t player-controlled and is frozen, set the execution threshold to 0.3.
- If the target is an Elite and their execution threshold is below the execution threshold set by Old GuillotinesInstantly kill low health Elite monsters.Instantly kill Elite monsters below 13% (+13% per stack) health. of the attacker, set the execution threshold to the threshold of the Guillotines.
- If the target’s combined health is below the amount dictated by the execution threshold, set their health to minus 1.
- If the target is now dead (health less than or equal to 0), tell the game to check for on-death effects.
One-Shot Protection
(See also: Health)
One-shot protection is visible on the HUD as a faint overlay on the health bar, protecting the player from dying to a single instance of damage when above 90% health. «Curse» effects which lower maximum health by 10% or more, such as Shaped GlassDouble your damage… BUT halve your health.Increase base damage by 100% (+100% per stack). Reduce maximum health by 50% (+50% per stack). or the Artifact of Glass, will remove one-shot protection.
A single hit taken cannot deal more than damage. This is checked after damage-reducing effects such as armor are applied.
After receiving damage that triggers one-shot protection, the protection will remain for 0.1s, meaning health cannot be reduced below the resulting health after the initial hit.
Unlocking
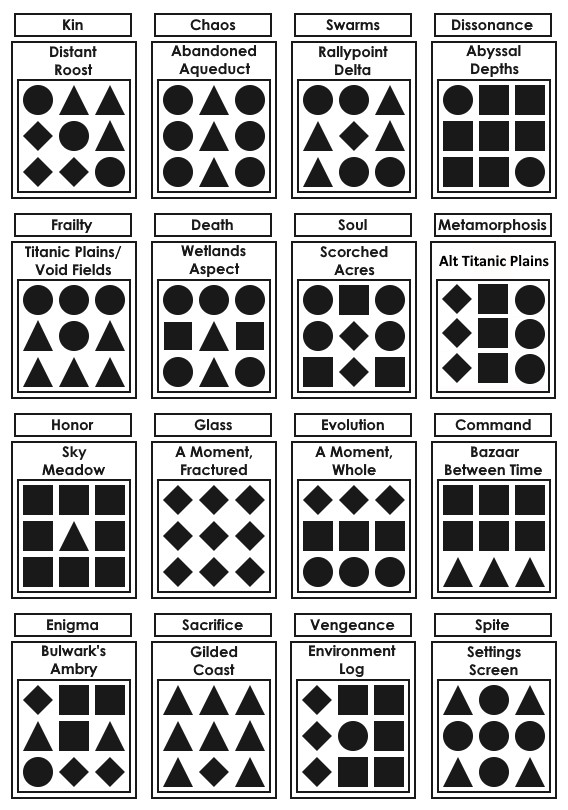
To unlock an Artifact, the player must input an Artifact Code in Sky Meadow using the below the map, then interact with the laptop. A portal to the trial for that Artifact in Bulwark’s Ambry will spawn.
The Compound Generator’s inputs will cycle in the order: square, circle, triangle, diamond (■ ● ▲ ).
In the Ambry, the Artifact whose trial is being attempted will be active (in addition to any other Artifacts that were enabled at the start of the run), and an Artifact KeyA stone shard with immense power. will spawn on an elevated block in front of the Artifact Reliquary. The player must pick up the Artifact Key and then interact with the Artifact Reliquary, which will cause monsters to start spawning. More Artifact Keys will randomly drop from killed monsters. Using an Artifact Key will remove them from all players’ inventories, preventing players from hoarding keys.
Upon destroying the Artifact Reliquary, the Artifact can be taken and a portal to a will appear.
Chaos
- Players are susceptible to their own explosions caused by their items, such as Brilliant BehemothAll your attacks explode!All your attacks explode in a 4m (+2.5m per stack) radius for a bonus 60% TOTAL damage to nearby enemies., Runald’s BandHigh damage hits also blasts enemies with runic ice. Recharges over time.Hits that deal more than 400% damage also blasts enemies with a runic ice blast, slowing them by 80% for 3s (+3s per stack) and dealing 250% (+250% per stack) TOTAL damage. Recharges every 10 seconds., Will-o’-the-wispDetonate enemies on kill.On killing an enemy, spawn a lava pillar in a 12m (+2.4m per stack) radius for 350% (+280% per stack) base damage., Sticky BombChance on hit to attach a bomb to enemies.5% (+5% per stack) chance on hit to attach a bomb to an enemy, detonating for 180% TOTAL damage. etc. If any of their attacks activate these items, it can damage and potentially kill them. Try to avoid these items with this Artifact active, especially for melee Survivors.
- In addition, Will-o’-the-wispDetonate enemies on kill.On killing an enemy, spawn a lava pillar in a 12m (+2.4m per stack) radius for 350% (+280% per stack) base damage. explosions cannot be blocked by Tougher TimesChance to block incoming damage.15% (+15% per stack) chance to block incoming damage. Unaffected by luck..
- Similarly, players will be hurt by their own skills that create explosions.
Artifacts
All the artifacts.
Artifacts are really just ways to alter how the game is played, and once collected, add additional game options at the character select screen. Some, like Command, are just better for the player. Others, like Distortion, make the game significantly harder. Others are mixed, such as Spirit, offering benefits to the player and enemies alike.
These can be collected in multiplayer, and as long as one person playing has collected the artifact the option can be enabled (although collections must be done independently for all players to use the artifact in single player); i.e. it’s not limited to the host. Artifacts can be collected on
— RAINSTORM -This is the way the game is meant to be played!Test your abilities and skills against formidable foes.
and
— MONSOON -For hardcore players.Every bend introduces pain and horrors of the planet.You will die.
difficulties and it is not required to beat Providence. Picking it up and dying or quitting is sufficient.
| Icon | Name | Area | Game effect | Notes | Item | Name |
|---|---|---|---|---|---|---|
| Honor | Desolate Forest | Enemies always spawn as elites | Has good synergy with 56 Leaf Clover. Using this artifact will decrease spawn rates as all enemies are elites. | |||
| Kin | Dried Lake | Only one enemy type spawns per stage | Enemy type is determined upon entering the area and is listed up next to the difficulty bar and timer. | |||
| Distortion | Damp Caverns | Lock a random skill every minute | Can lock your primary Z skill and is not guaranteed to switch skills on the next minute mark | |||
| Spite | Sky Meadow | Enemies explode on death | Enemies release particles that resemble the Engineer’s grenades, which fly at random trajectories and bounce for a few seconds before exploding. Be aware that these grenades only hurt the player, not enemies. | |||
| Glass | Ancient Valley | Deal 500% damage, but have 10% health | Useful to unlock the «no damage» achievements.
Does not affect the HP gained from Infusion, even though it probably should. |
|||
| Enigma | Sunken Tomb | Use items have a random effect | It is itself a use item that you get at the start. It has a random (use item) effect when used. Can be replaced if you find another use item. Replaces all use item drops with Small Enigma, which decreases cooldown. | |||
| Sacrifice | Magma Barracks | Chests no longer spawn; monsters now drop items on death | Effect of this artifact stack with 56 Leaf Clover. | |||
| Command | Hive Cluster | Items are no longer random | This one is easy to get and makes getting the others easier | |||
| Spirit | Temple of the Elders | Characters run faster at lower health | Applies to enemies as well | |||
| Origin | Risk of Rain (Level) | Imps invade the map every 10 minutes | Every 10 minutes, large portal appears and spawn 3 to 5 Purple Imps and 1 Imp Vanguard. |
Interesting Artifact Combinations[]
Command + Sacrifice: Argued to be «the best» way to get your ideal item build as fast as possible. This is only true if massive amounts of farming are done early in the game, well past the point where all chests in a given level have been unlocked. However, in any other case, Command on its own works better. Chests, shrines, drones, etc. will all appear throughout the game, and are guaranteed even on early levels, whereas with Sacrifice it is possible to get very few items every map (sometimes just the Boss’s drop). If players stack 56 Leaf Clover, as they presumably would anyway even with Sacrifice, more and more drops will appear from enemies as the game progresses into spawning more elites. This means that more items are guaranteed to be available at the start of a game, and then the Clover will increase later drops to also be more frequent than if Sacrifice were also on. Sacrifice will only be advantageous if significant farming is done in approximately the first two maps, before any clovers would reasonably be acquired.
ý
Command + Sacrifice + Glass: If you avoid dying early, this can be used to farm even faster. By using command to get infusion early on, the downsides of glass can be completely avoided allowing you to do the same run as above with 500% damage.
Command + Glass + Honor: The best way to get the ideal item build as fast as possible. If players stack 56 Leaf Clover, all monsters will always have a chance to drop items.
Honor + Kin: Significantly reduces the difficulty of using Honor (stops Overloading Magma Worms spawns!), and passively increases item drop rate.
All Artifacts: Not as hard as it sounds. While difficult due to the danger of Glass, Spite, and Spirit, Kin turns off all boss spawns. Still easy to get destroyed, especially by stacked Jellyfish mobs or when Ancient Wisps get rolled (they seem to spawn with no sound, and will fire immediately).
All Artifacts except Kin and Command: Arguably the hardest mode. Players are at the mercy of RNG regarding what Use items get rolled Enigma, which skills get disabled due to Distortion, and the random items due to lack of Command. If not careful, a character’s escape skill will be locked at a critical moment, resulting in death. One somewhat nice thing is that matches will end very quickly if things start out badly, but otherwise huge momentum can be built and then it ends up difficult but very fun. In co-op, players must coordinate and share items in order to survive. It is possible to beat this mode.
REX

РЕКС — наполовину растение, наполовину выживший робот. Чтобы разблокировать его, вам нужно перенести топливный элемент из спасательной капсулы (на первом уровне) в Abyssal Depths. Его можно будет разблокировать только в Abyssal Depths, но как только вы его разблокируете, вы сможете играть за него во время следующего забега.
Вы можете найти REX на высокой платформе недалеко от центра карты. Чтобы добраться до платформы, запрыгните на одно из отверстий, которое подбрасывает вас в воздух. Оказавшись на высоких платформах, ищите РЕКСА, который появится в виде сломанного робота.
Ознакомьтесь с этим полным руководством по REX, чтобы узнать больше о том, как разблокировать его и играть за него.
Обычные предметы
Шприц солдата. Увеличивает скорость атаки на 15+ (15% за шт). Открыт с самого начала.
Тяжёлые времена. 15% (+15% за шт) шанс блокировать получаемый урон. Открывается после пяти смертей.
Зуб Монстра. При смерти врага из него выпадает сфера исцеления, восстанавливающая 6хп (+6 за шт.) . Открывается с самого начала.
Очки линзодела. Шанс срабатывания критического удара 10% (+10% за шт), наносящего двойной урон. Открыты с самого начала.
Козлиное копыто Пола. Увеличивает скорость движения на 14% (+14% за шт). Открывается после трёх неудач подряд в святилище удачи.
Буйногриб. Стоя на одном месте появляется зона исцеления, восстанавливающая 4,5% хп в сек. (+2.25% за шт), с радиусом 3м (+1.5м за шт). Открыт с самого начала.
Лом. Наносит 150% урона (+30% за шт) врагам, у которых более 90% здоровья. Открывается после нахождения десяти разных обычных предметов.
Трёхгранный кинжал. 15% (+15% за шт) шанс вызвать у врага кровотечение, наносящее 240% урона. Открыт с самого начала.
Боевой стяг. При повышении уровня появляется зона, повышающая скорость атаки и передвижения на 30%, в радиусе 16м (+8м за шт) Открыт с самого начала.
Осторожный слизень. Ускоряет пассивную регенерацию вне боя на 250% (+125% за шт). Открыт с самого начала.
Персональный генератор щита. Дает щит на 25 единиц (+25 за шт), восстанавливается вне боя. Открыт с самого начала.
Аптечка. Восстанавливает 10хп (+10 за шт), через 1.1 сек после получения урона. Для открытия нужно убить элитного монстра.
Бензин. После смерти врага поджигает всех врагов в радиусе 12м (+4м за шт), горящие враги получают 150% (+75% за шт). Открыт с самого начала.
Оглушающая граната. Шанс оглушить противника 5% (+5% за шт), при попадании по нему Открыта с самого начала.
Связка петард. При использовании объекта запускаются 8 (+4 за шт) ракет, которые наносят 300% урона. Для открытия нужно скопировать один и тот же предмет на принтере 7 раз.
Энергетик. Скорость спринта увеличивается на 30% (+20% за шт). Открыт с самого начала.
Запасной магазин. Добавляет 1 (+1 за шт) заряд к второй способности. Для открытия нужно зарядить портал ни разу не получил урона.
Бомба липучка. При попадании по врагу шанс 5% (+2.5% за шт) прикрепить бомбу липучку, наносящую 180% урона. Открыта с самого начала.
Ржавый ключ. Даёт возможность открывать спрятанный тайник. (Каждый ключ повышает шанс выпадения редкого предмета) Для открытия нужно победить босса портала за 15 секунд.
Бронебойные пули. Наносит 20% доп. урона по боссам (+20% за шт). Для открытия нужно 1 раз зарядить телепорт.
Кристалл сосредоточения. Повышает наносимый урон врагам в радиусе 13м на 15% (+15% за шт) Открыт с самого начала.
Брошка с топазом. При убийстве врага создаёт временный барьер с 20 единицами (+20 за шт). Открыта с самого начала.
Артефакты
- Артефакт Чести – будут появляться только элитные враги.
- Артефакт Тайны – появление со случайным снаряжением, изменяющимся каждый раз после использования.
- Артефакт Ненависти – враги выбрасывают несколько взрывающихся бомб после смерти.
- Артефакт Души – появляются огоньки из побежденных монстров (виспы, только синие).
- Артефакт Смерти – когда умирает один игрок, умирают все. Включайте только если хотите по-настоящему испытать личные навыки и командную работу.
- Артефакт Возмездия – ваш безжалостный двойник будет нападать каждые 10 минут.
- Артефакт Управления – выберите свои предметы.
- Артефакт Стекла – вы и союзники наносят 500% урона, но ваш запас здоровья снижен до 10%.
- Артефакт Хаоса – дружественный огонь активирован как для выживших, так и для монстров.
- Артефакт Разлада – монстры могут появляться вне привычных мест обитания.
- Артефакт Эволюция – монстры получают предметы между уровнями.
- Артефакт Изменения – игроки всегда будут появляться как случайные выжившие (рандомный выбор персонажа).
- Артефакт Жертвы – из монстров после смерти выпадают предметы, но сундуки больше не появляются.
- Артефакт Родства – на каждом уровне будет только один тип монстров.
- Артефакт Роя – частота появления монстров удвоена, но их максимальных запас здоровья сокращен вдвое.
- Артефакт Хрупкости – урон от падений удваивается и становится смертельным.
На новой карте, (которая появляется на пятом этапе) под картой есть область, на которую легко попасть, просто прыгните вниз в нужном месте, там же, вы найдете большой телепорт к которому идут какие-то провода, такой же, кстати, есть в главном меню, но не суть важна.
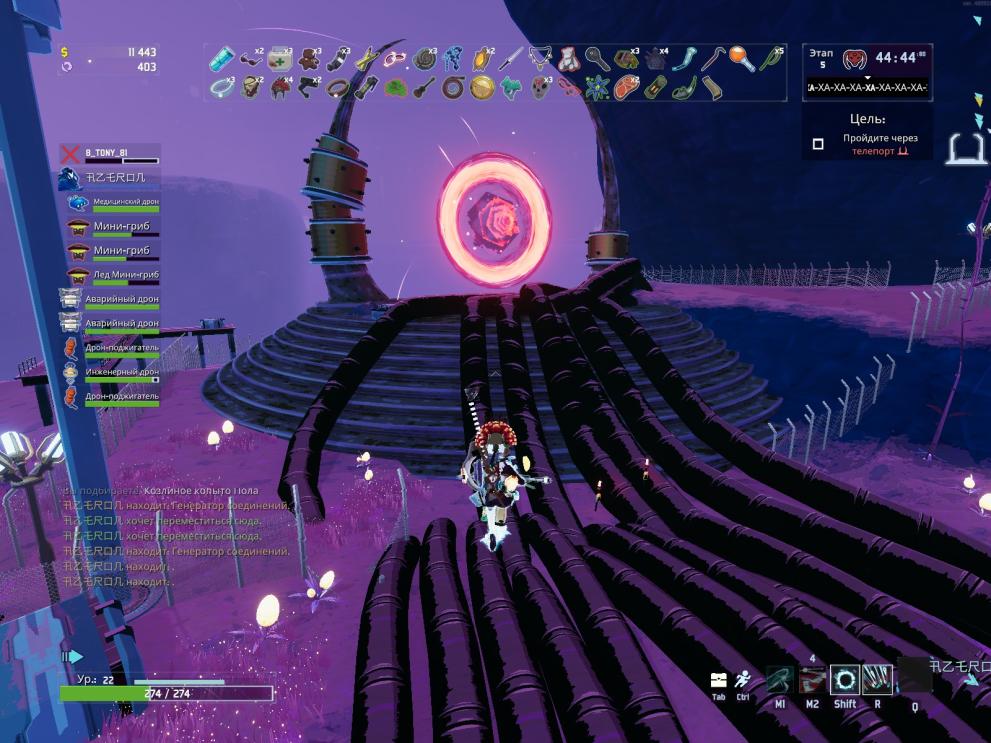
Чтобы активировать этот портал, вам нужно пройтись про этим проводам вниз, где вы найдете ноутбук и.. легче будет показать:
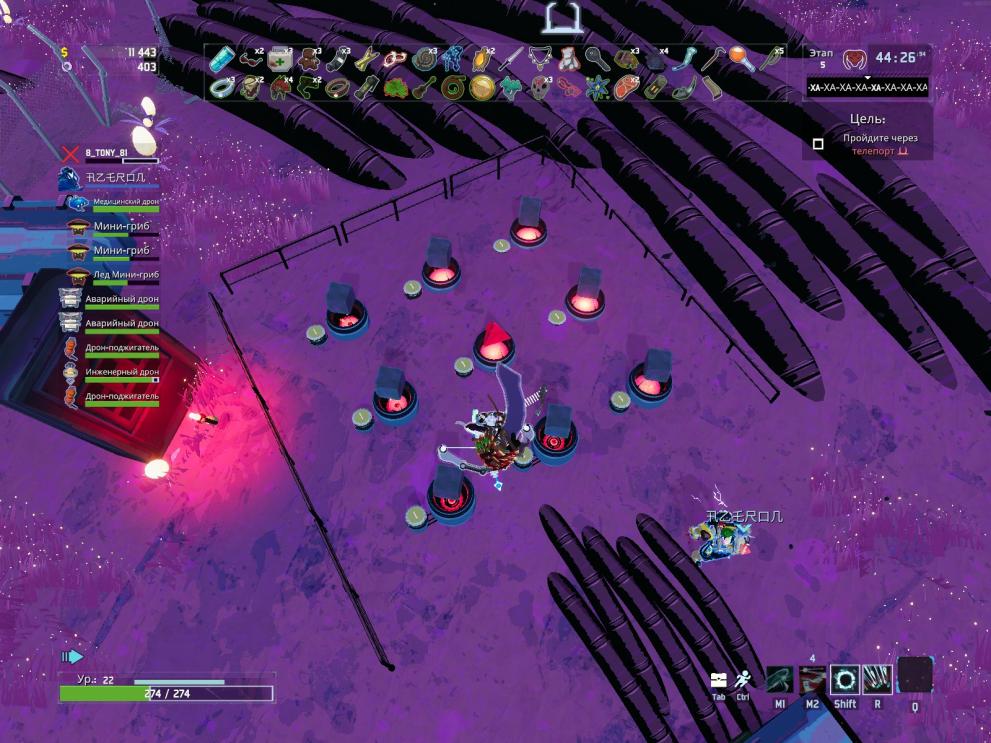
Там вы вводите правильную комбинацию из кругов, ромбиков, треугольников, квадратов. Эти же комбинации вы можете найти на разных картах, спрятаны они конечно жутко сложно, но специально для вас – мы достали весь список комбинаций.
Если вы неправильно введете комбинацию – ничего не случится – это знак, что вы делаете что-то не так.
После того, как вы правильно выставили комбинацию – нажимайте на ноутбук, который находится совсем рядом, после чего, если портал активировался – заходите в него и попадайте на новую локацию.
В зависимости от выбранного вами артефакта – по центру будет фигурка, а на карте будет золотой ключ.
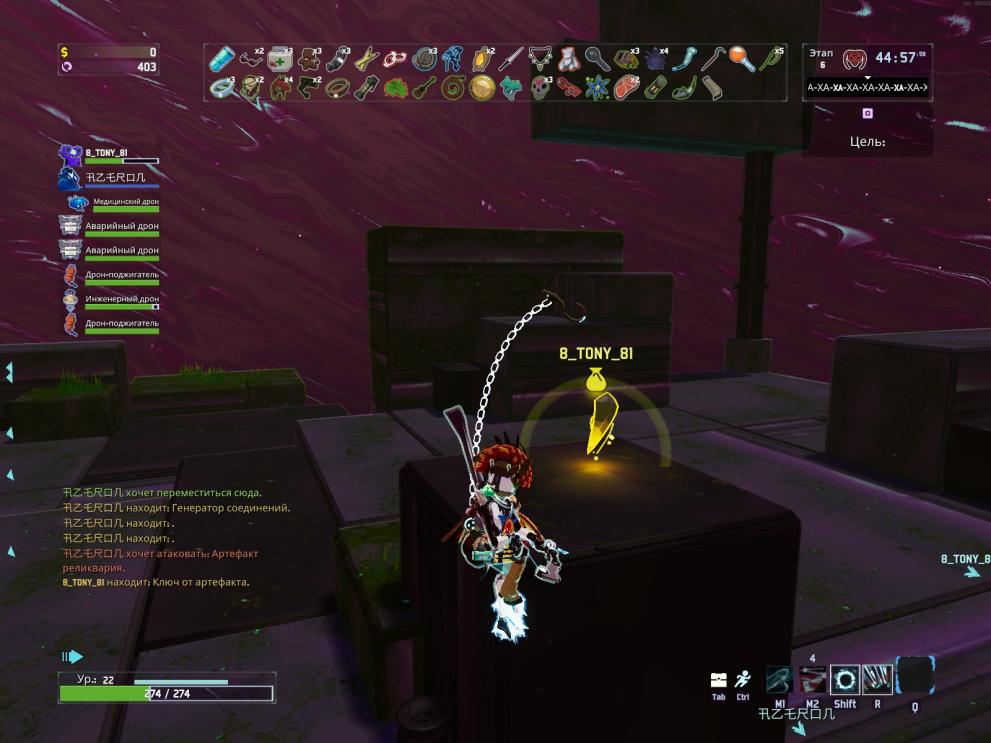
Этот золотой ключ нужно взять и отнести к той фигурке – вокруг которой крутятся кольца, нажимайте на английскую E и активируйте этот объект. После активации появятся монстры с которых после смерти падает ключ, который также нужно совать в тот объект.
После того, как вы полностью завершили это мини событие, идете в портал и вуаля – у вас открылся артефакт, комбинацию которого вы ввели вначале.
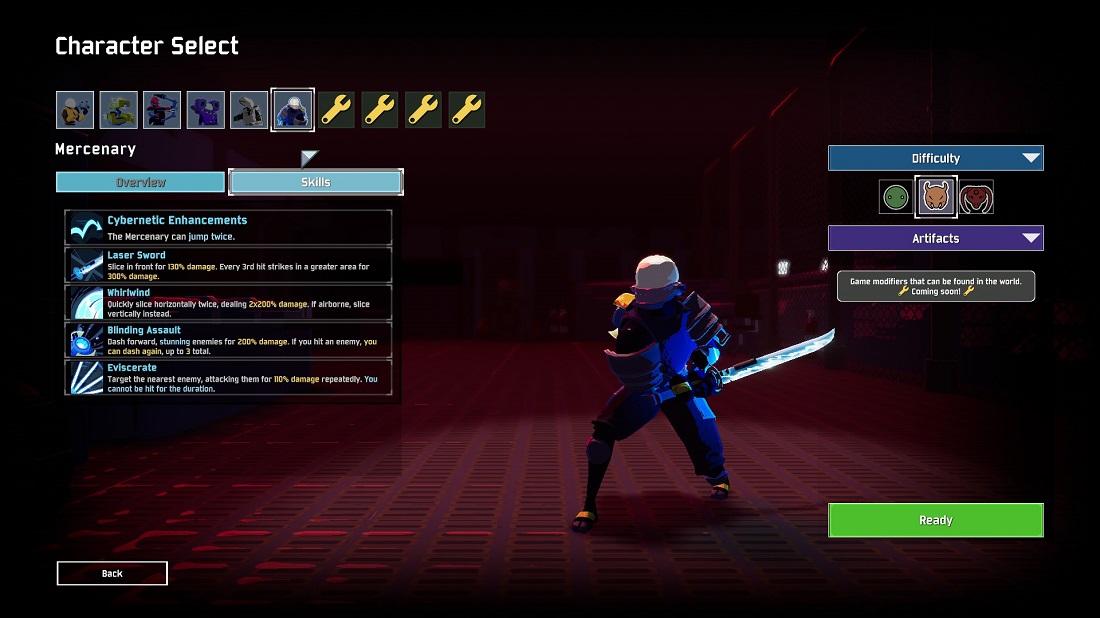
Mercenary
Как же открыть Mercenary? Ответ прост – чистый рандом.
После первого круга (на снежной локации) рядом с телепортом появляется портал, похожий на портал на базар. Заходим в него, попадаем в локацию Hidden Realm.
(Нужный обелиск находится в самом низу, спускайтесь аккуратно).
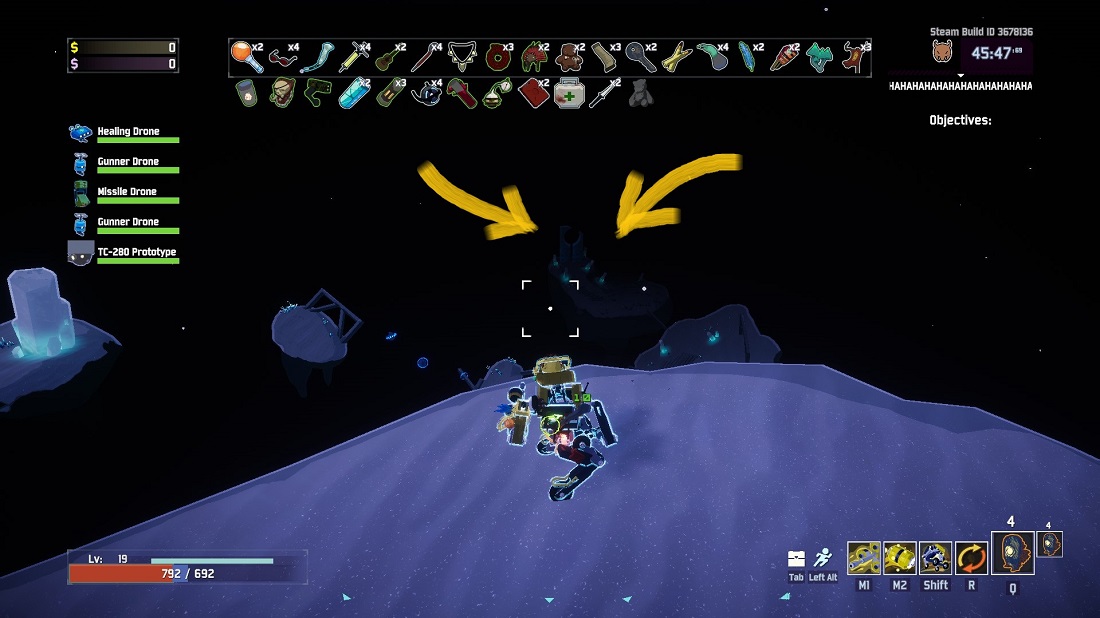
Подходим к обелиску и активируем его ДВА РАЗА.
Внимание!!! Вы погибнете после второй активации обелиска. Сообщения о том, что персонаж открыт НЕ будет, но во время следующего выбора персонажа он появится как доступный.. Особенности: Ближний бой
Двойной прыжок
Особенности: Ближний бой. Двойной прыжок
Параметры:
- Здоровье: 140 (+42 за лвл).
- Дмг: 12 (+2.4 за лвл).
- Скорость: 7 метров\сек.
Способности (сверху вниз):
- Атака мечом, каждая ТРЕТЬЯ атака наносит 300% урона и имеет больший радиус.
- Круговая двойная атака мечом. Стоя на земле горизонтальная\в прыжке – вертикальная.
- Рывок вперед, станящий задетых врагов. Если задет моб – можно сделать еще один рывок. До трёх рывков (+1 за попадание в моба).
- Танец лезвий. Быстро режет врага, 6 ударов. Вы не можете получить урона во время действия способности.
Достижения персонажа Mercenary (Наемника)
Наемник (Мерс) — персонаж только ближнего боя. У него только один навык дальнего боя, что удивительно. Этот персонаж только для игроков, которые умеют играть. Вот все его достижения:
True Respite
Убиться у Обелиска. Открывает Наемника. Как открыть: Чтобы попасть к Обелиску, требуется дойти до третьей локации первого лупа (Точка Доступа «Дельта»/Выжженные Акры). После зарядки телепорта появится «Celestial Portal» (Небесный Портал), активировав его вы попадете в скрытую локацию. Пройдя паркур, подходите к Обелиску и два раза нажимаете кнопку взаимодействия (по умолчанию E). Ваш забег закончится, будет начислено пять лунарных монет, и если вы делаете это в первый раз — откроется Наемник.
Mercenary: Demon of the Skies
Играя за наемника не касаться земли в течение 30 секунд. Открывается Альтернативный ПКМ.
Открытие: Для открытия всего лишь нужна активка «Молочная Куколка» (Milky Chrysalis), просто берите ее и взлетаете вверх.
Mercenary: Ethereal
Пройти Призматическое Испытание, но чтобы здоровье не опускалось ниже 100%. Открывает альтернативный R-навык.
Как открыть: Сложнейшее достижение в данной игре. Но перед началом вкратце объясню, что такое «Призматик». В главном меня есть кнопка «Другие Режимы Игры». Нажав на нее вас перебросит на экран с выбором, во что поиграть. Выбирайте Призматическое Испытание. Суть этого испытания состоит в том, чтобы пройти два этажа. Этажи случайные, но сами «Призматики» сидированные, то есть один и тот же призматик у разных игроков будет одинаковым, из-за этого у кого-нибудь другого можно посмотреть наиболее эффективный способ прохождения. А по условию самого достижения — тут также, как и с Баллистой Охотницы, надо брать Топазовую Брошь (лучше 2-3) и Kjaro’s Band с Runald’s Band для ваншота боссов. Также немаловажную роль играет рандом, ибо Призматик может быть ужасным (с ужасным набором артефактов, сложными боссами, сложными врагами), а может быть халявным.
Mercenary: Mastery
Пройти игру или убиться у Обелиска на максимальном уровне сложности (Мунсон). Открывает Альтернативный скин.
Как открыть: Советую идти именно к Обелиску, а не к Митриксу. Если не получается: ждите легкого Призматика и открывайте альтернативную R-ку, она очень сильная в связке со стандартным ПКМ-ом. Артефакт «Command» также поможет.
Mercenary: Flash of Blades
Использовать 20 способностей (навыков) за 10 секунд. Открывает Альтернативный Shift-навык.
Как открыть: Берите артефакт Command, минимальную сложность. На первом этаже берите несколько белых предметов «Backup Magazine» (Запасной магазин), штуки 3-4 вполне достаточно. После этого находите какого-нибудь врага и спамьте все навыки как только можете. Главное: попадать Shift-ом по врагу.