Гайд по muck
Содержание:
- Gameplay
- Status Bars
- Muck лагает. Большая задержка при игре. Решение
- Как открыть все виды луков в Muck
- Лучшие навыки Void Gauntlet
- Трейнер (+8) от 12.07.2021 [WeMod]
- Инструкция по установке трейнера
- Step 5: Overwrite Assembly-CSharp.dll
- В Muck нет звука. Ничего не слышно. Решение
- Как создать лук в Muck
- Rare Drops
- Powerups
- Low Tier
- Medium Tier
- High Tier
- Basics
- Gameplay
- Basics
Gameplay
See main article: Game Guide
Muck is very reminiscent of familiar survival and rogue-like titles, namely Minecraft and Risk of Rain 2, the latter of which the game was very heavily inspired by.
World generation
Example of a Perlin Noise Map used to outline world terrain.
A world spawns as an island. It will always spawn with:
- A Shipwreck
- At least one Trader Camp, Cave and Ore Chunk for each Ore (excluding Chunkium
There will always be at least one Chiefs Chest per Trader Camp.
)
- 50 Battle Totems
- Various amounts of Loot Containers, Wooden Carts, Huts and Boss Totem (at least one for each boss)
- A Boss Totem for each colored Guardian
World generation relies on a Perlin Noise Map, differentiating each world seed. An ocean will surround the world, which will gradually kill any players which enter it. The world will generally spawn with a variety of lakes on the island.
Movement and controls
See main articles: Controls, Player Status
Players are able to move and jump through set Game Controls, players also have an ability to sprint, reliant on Stamina (able to be regenerated over time or with Foodstuffs). Players can also swim, however, extended periods of time in water can cause the player to gradually drown. Players are able to interact, message through the in-game chat, attack, place, and view the map through their appointed controls.
Game Modes
See main article: Game Modes
There are three Game Modes to choose from, providing the player a different game experience. These game modes include Survival Mode as a base gamemode, where the player must beat the game among enemies and obstacles, Creative Mode alike the former but without ambient enemy spawning, and Versus Mode where players are challenged against one another, with a winner being decided as the last player standing.
Mining, Harvesting and Forging
Iron Ore chunk among Trees.
Players can harvest Ore from various Ore outcrops around the world and combine them with their corresponding Wood type to create powerful Weapons, Tools and Armor. The game follows a systematic progression where mining an ore and harvesting the parallel wood variant allows a tool set to be crafted, of which can mine the next, stronger ore and wood set.
Looting
A Trader Camp
Players are able to loot Trader Camps, Wooden Carts, Huts for Items and Loot Containers for Upgrades, locating these allow an easy way for players to upgrade easily at the start of the game. Players may also undertake fights through Battle Totems and Boss Totems in return for item drops, Coins and Upgrades.
Crafting
See main article: Workstations and Recipes
Crafting can occur through a Workstation and requires a set list of crafting ingredients in order to do so. Early game items are crafted through a Workbench, Armor and Melee weapons are crafted typically through an Anvil, Ranged weapons are typically crafted through a Fletching Table, Ore smelting takes place in a Furnace, and the crafting of Foodstuffs takes place in a Cauldron. The method of crafting presents itself alike to similar games.
Trading
Example of a Woodman’s trading menu.
See main article: Woodman
As of Version 1.3, player’s are able to interact with Woodmen to trade with certain items. Trading can go both ways and as a result players can gather rare items easily.
Enemies
See main article: Enemies
During the player’s adventure, Enemies will ambiently spawn in the background and more frequently during nightfall. Enemies have varied minimum day spawns, seperating their difficulties. Enemies can drop rare drops similar to Bosses. Health for enemies will scale over time, depending on difficulty.
Bosses
The bossfight with Bob
See main article: Bosses
With preperation, a set of Bosses can be fought, dropping rewards in the form of rare items to further build up the player’s strength. The game bosses vary in difficulty depending on the time and Difficulty they are fought. Six bosses must be fought and defeated in order to complete the game, including the colored Guardians and Bob, whereas the others, Big Chunk, Gronk, Chief and regular Guardians are mostly obsolete and are usually only fought for the player’s benefit. Upon repairing the Shipwreck fully, triggering the end cutscene, and defeating Bob as the final boss, the player is rewarded with the completion of the game.
Achievements
See main article: Achievements
The Achievements stand as preset goals designed to encourage gameplay and experimentation. There are 49 total achievements available through Steam.
Status Bars
There are 3 main status bars, located at the bottom right of the player’s screen. Each of these statuses starts out with a maximum value of 100, which can be restored using Food and increased (in some cases) using powerups.
Status Bars
Health
Health is the most important status bar the player has. The maximum health of the player can be increased using Red Pills, and the player’s shield can be increased using Blue Pills, which are added onto the total health. There are three ways the player can lose health: Enemies, other players, and drowning. If the player’s health reaches 0, then they die, and if all players are dead at the same time, the game is over.
- The amount of damage taken can be reduced by increasing one’s stat.
- Health is regenerated over time if the player has Broccoli.
- The regeneration rate can be expressed as per second, where n is the number of Broccoli the player has.
- In other words, every 4 Broccoli is one health per second. For example, if the player had 2 Broccoli, then they would heal 0.5 health/s, or 1 health every 2 seconds.
Hunger
Hunger is an important status that allows the player to regenerate stamina, and can be extremely beneficial to keep high. Unlike the other two statuses, which can be naturally increased, the only way to regenerate hunger is by consuming Food. The Hunger bar is always being reduced, and running increases this rate by a factor of 5.
- Hunger loss can be expressed as , where n is the amount of Spooo Beans the player has and t is the time that has passed (in seconds).
- When the player is running, the leading coefficient is increased to 0.375 from 0.075.
- Spooo Beans cannot reduce the rate by more than a factor of 2.
This means that if the player were to only walk and had no Spooo Beans in their inventory, then they would run out of hunger in just over 11 minutes.
| Spooo Bean count | 1 | 2 | 3 | 4 | 5 | 6 | 7 | 8 | 9 | 10 | 11 | 12 | 13 | 14 | 15 | 16 | 17 | 18 | 19 | 20 |
|---|---|---|---|---|---|---|---|---|---|---|---|---|---|---|---|---|---|---|---|---|
| Hunger slowdown rate | 1.10 | 1.20 | 1.29 | 1.38 | 1.46 | 1.54 | 1.60 | 1.66 | 1.72 | 1.76 | 1.80 | 1.83 | 1.86 | 1.89 | 1.91 | 1.92 | 1.94 | 1.95 | 1.96 | 1.96 |
Stamina
Stamina level is indicated by the third status bar, colored pink. It is expended when the player runs, swims, or jumps. It is naturally recovered at a rate of 15% second whenever the player’s hunger is greater than 0, the player is grounded, and the player is not performing any actions that expend stamina. If the player is in water while out of stamina, then they would lose health periodically from drowning damage.
- The percentage of Stamina drained while running and swimming can be expressed as per second, where n is the number of Peanut Butter upgrades the player has, and AB is the Adrenaline Boost.
Jumping decreases the stamina by 10.
| Peanut Butter count | 1 | 2 | 3 | 4 | 5 | 6 | 7 | 8 | 9 | 10 | 11 | 12 | 13 | 14 | 15 | 16 | 17 | 18 | 19 | 20 | |
|---|---|---|---|---|---|---|---|---|---|---|---|---|---|---|---|---|---|---|---|---|---|
| Relative efficiency | 1.00 | 1.15 | 1.30 | 1.45 | 1.60 | 1.75 | 1.90 | 2.05 | 2.20 | 2.35 | 2.50 | 2.65 | 2.80 | 2.95 | 3.10 | 3.25 | 3.40 | 3.55 | 3.70 | 3.85 | 4.00 |
| Drain per second (%) | 15.0 | 10.4 | 9.23 | 8.28 | 7.50 | 6.86 | 6.32 | 5.85 | 5.45 | 5.11 | 4.80 | 4.53 | 4.29 | 4.07 | 3.87 | 3.69 | 3.53 | 3.38 | 3.24 | 3.12 | 3.00 |
| Max consecutive seconds (without eating) | 8.3 | 9.6 | 10.8 | 12.1 | 13.3 | 14.6 | 15.8 | 17.1 | 18.3 | 19.6 | 20.8 | 22.1 | 23.3 | 24.6 | 25.8 | 27.1 | 28.3 | 29.6 | 30.8 | 32.1 | 33.3 |
Armor Ratio
There is also a 4th, smaller status bar above the main 3, which represents the Armor Ratio of the player. The white represents the total armor the player has, which is out of 100, and is a good visualization of the % damage reduction granted from the armor.
Muck лагает. Большая задержка при игре. Решение
Многие путают «тормоза» с «лагами», но эти проблемы имеют совершенно разные причины. Muck тормозит, когда снижается частота кадров, с которой картинка выводится на монитор, и лагает, когда задержка при обращении к серверу или любому другому хосту слишком высокая.
Именно поэтому «лаги» могут быть только в сетевых играх. Причины разные: плохой сетевой код, физическая удаленность от серверов, загруженность сети, неправильно настроенный роутер, низкая скорость интернет-соединения.
Впрочем, последнее бывает реже всего. В онлайн-играх общение клиента и сервера происходит путем обмена относительно короткими сообщениями, поэтому даже 10 Мб в секунду должно хватить за глаза.
Как открыть все виды луков в Muck
Свиток начального деревянного лука можно усовершенствовать, поэтому для доступа к более мощному вооружению потребуется накопить редкие ресурсы и открыть все рецепты. На данный момент игрокам для изготовления и использования доступно четыре лука:
- Деревянный лук (начальное дальнобойное вооружение) — 1 единица веревки и 10 единиц дерева.
- Берёзовый лук (мощнее деревянного) — 1 единица веревки и 10 единиц берёзовой древесины.
- Еловый лук (мощнее берёзового) — 1 единица веревки и 10 единиц еловой древесины дерева.
- Дубовый лук (мощнее елового) — 1 единица веревки и 10 единиц дубовой древесины.
- Древний лук (самый мощный) — 1 единица веревки и 1 древняя кость (выпадает из гоблинов и Гронка).
Для доступа к каждому улучшению лука потребуется установить печь за 15 камней, котёл за 10 единиц дерева и 10 камней, а также разместить наковальню за 5 железных слитков и 15 камней. Каждая постройка откроет доступ к новым рецептам, а поиски соответствующей руды позволят создать улучшенные версии топора и кирки, которые можно использовать на указанные выше новые виды деревьев.
Не забываем создавать и использовать усовершенствованные стрелы, доступные на столе для луков и стрел в одноимённом разделе:
- Кремнёвая стрела (начальный предмет) — 1 единица кремня и 4 единицы дерева.
- Железная стрела (мощнее кремнёвой стрелы) — 1 стальной слиток и 5 единиц берёзовой древесины.
- Мифриловая стрела (мощнее железной стрелы) — 1 мифриловый слиток и 5 единиц елевой древесины.
- Адамантитовая стрела (мощнее мифриловой стрелы) — 1 единица адамантита и 5 единиц дубовой древесины.
- Элементальные стрелы (самые мощные) — стрелы трёх стихий (огонь, вода, молния), которые создаются при помощи 1 единицы соответствующего стихии элементального шара и 1 единицы древесины тёмного дуба.
- В Steam вышел самый расслабляющий симулятор для русских пользователей-интровертов
- «Жанр MMO Survival вот-вот изменится» — свежий тизер якутского шутера в духе The Last of Us и The Division
- Вышел трейлер новой ролевой игры с крутой графикой и огромными боссами в духе Assassin’s Creed Valhalla и Valheim
Лучшие навыки Void Gauntlet

Amazon Игры
Умения и пассивы Void Gantlet очень сильно различаются, поэтому важно иметь хорошую стратегию при расходовании очков мастерства
| Навык | Описание |
| Сфера разложения | Выстрелить неблокируемым импульсом, который проходит сквозь врагов, наносит 100% урона от оружия и вызывает дезинтеграцию, нанося 5% урона от оружия в секунду и снижая поглощение урона на 5% в течение 8 секунд. Суммируется до 3 раз. На максимальном расстоянии он превращается в исцеляющую сферу и возвращается, исцеляя союзников на 20% урона от оружия в секунду в течение 5 секунд. Исцеление масштабируется исключительно за счет концентрации. |
| Гибельная связь | Выстрелить снарядом, который привязывает вас к врагу, ослабляя его и усиливая вас на 4% в секунду (максимум 20%). Трос обрывается, если цель перемещается более чем на 15 метров. |
| Забвение | Создает у ваших ног круговой разрыв энергии Бездны, который наносит 30% урона от оружия и дает Empower себе и друзьям, увеличивая урон на 20%. |
- Сфера разложения: сочетание исцеления и урона в Сфере разложения делает его отличным вариантом для игроков, которым нужна помощь в экспедициях и войнах. В одиночку это не принесет особого смысла, но станет ключевой частью командной сборки.
- Baleful Tether: Baleful Tether — отличный инструмент в случае, если вы станете агрессивным при использовании перчатки. Это накажет врагов, которые находятся слишком близко, и, надеюсь, уведет их от вас, когда они попытаются вырваться из троса.
- Oblivion: имеет то же значение, что и Orb of Decay, давая игроку возможность исцелять и усиливать союзников и самих себя, а также возможность наказать тех, кто бросается на вас.
Трейнер (+8) от 12.07.2021 [WeMod]
Категории файлов для Muck
— Все файлы (2)
— Читы (2) — Трейнеры (2)
Добавить новый файл
Дата создания/обновления трейнера: 12.07.2021Язык трейнера: АнглийскийКоличество функций: 8
Во время игрового процесса нажимаем на нужные клавиши (которые можно редактировать) и получаем желаемый результат.
Внимание:Для использования трейнера необходима установка системы WeMod (требуется онлайн подключение).Скачивание трейнера осуществляется только через WeMod, используя прикреплённый к посту лаунчер.Возможна ложная тревога антивирусов на лаунчер, перед игрой не забудьте отключить AV во избежание конфликтных ситуаций с ним. На пиратке требует покупку PRO версии
На пиратке требует покупку PRO версии.
Инструкция по установке трейнера
Как правильно распаковать файл?В 95% случаев файлы для игр представлены в формате .RAR или .ZIP. Первые можно скачать и распаковать с помощью триал-версии программы WinRAR. Для этого откройте архив с помощью этой программы с нажмите на кнопку “Извлечь” (“Extract to” в английской версии) и выберите любую папку на жестком диске, но не выбирайте папку с игрой, так как в архиве могут быть вложенные папки, и тогда файл не заработает.Если файл запакован в ZIP-архив, то достаточно будет открыть его через стандартный “Проводник” Windows. Иногда могут встречаться архивы с расширением .7Z, чтобы распаковать их, потребуется загрузить архиватор 7-Zip. Он бесплатный и довольно удобный, и к тому же может работать с .RAR и кучей других, менее популярных типов архивов.Как правильно установить трейнер?Когда вы распаковали архив, найдите его через «Проводник» и просмотрите содержимое папки. Обычно трейнер представляет собой один-единственный файл с расширением .EXE, но иногда может включать в себя и другие, а также инструкцию (обычно называется ReadMe.txt).Способ установки у всех трейнеров схож и заключается в том, чтобы поместить все файлы в дистрибутив игры, в ту же папку, где находится исполняемый файл, который и отвечает за запуск игры. Иногда найти его не так уж и просто, но если у вас на рабочем столе есть иконка, с помощью которой можно запустить игру, то вы можете воспользоваться следующим способом:1. Нажать правой кнопкой мыши на иконку;2. В открывшемся контекстном меню выбрать опцию «Свойства»;3. В открывшемся окне перейти на вкладку «Ярлык» и нажать на кнопку «Расположение файла».После этого в «Проводнике» откроется папка, в которой и находится EXE-файл игры. Трейнер нужно скопировать в ту же папку, если в инструкции, приложенной к трейнеру, не сказано иначе.После этого останется только запустить трейнер и ознакомиться с сочетаниями клавиш для активации его возможностей, а затем, не закрывая трейнер, запустить игру.
Step 5: Overwrite Assembly-CSharp.dll
In order to save your code, you need to hit “Compile” in the code window. If you don’t have any errors, the window should close. This won’t save your changes though, in order to save them you need to “File -> Save All -> Okay” Congratulations! You have created your first mod for Muck. Boot up the game and try to jump. (You go VERY high lol) But yeah that’s almost it. Most of the fun in Muck comes from the online multiplayer, but these mods are all client side. If you create a mod that modifies terrain generation for example, you will need to send your friend(s) your Assembly-CSharp.dll file so they can replace theirs and actually see / use your mod. Thank you for reading!
Written by Sir Topham Hatt
Hope you enjoy the Guide about Muck – How To Create Mod in Muck Tutorial, if you think we should add extra information or forget something, please let us know via comment below, and we will do our best to fix or update as soon as possible!
Recommended for You:
В Muck нет звука. Ничего не слышно. Решение
Muck работает, но почему-то не звучит — это еще одна проблема, с которой сталкиваются геймеры. Конечно, можно играть и так, но все-таки лучше разобраться, в чем дело.
Сначала нужно определить масштаб проблемы. Где именно нет звука — только в игре или вообще на компьютере? Если только в игре, то, возможно, это обусловлено тем, что звуковая карта очень старая и не поддерживает DirectX.
Если же звука нет вообще, то дело однозначно в настройке компьютера. Возможно, неправильно установлены драйвера звуковой карты, а может быть звука нет из-за какой-то специфической ошибки нашей любимой ОС Windows.
Как создать лук в Muck
Перед тем, как углубиться в систему крафта и произвести долгожданное оружие, необходимо собрать 10 единиц дерева и установить верстак. Для этого подбираем ближайший камушек (Rock) и добываем нужное количество с самых обычных деревьев. Открываем инвентарь и используем накопленные ресурсы для размещения верстака (Workbench).
Теперь необходимо установить специальный стол для луков и стрел (Fletching Table). На его постройку необходимо накопить 25 единиц берёзовой древесины (Birch Wood) и 10 единиц кремня (Flint). Создаём деревянный топор (Wood Axe), для которого потребуется собрать 5 единиц коры и 5 единиц дерева, и отправляемся к берёзе. Для получения достаточного количества коры необходимо скрафтить предмет в инвентаре при помощи 5 единиц дерева.
Используем топор и разрубаем деревья, чтобы получить все необходимые ресурсы. Также крафтим деревянную кирку (Wood Pickaxe) и добываем при помощи неё кремень из ближайших каменных залежей. Устанавливаем стол для луков и стрел недалеко от верстака. На этом этапе рецепт лука будет всё ещё недоступен. Отправляемся на изучение окрестностней и собираем 10 единиц пшеницы (Wheat). Снова создаём 10 единиц коры и крафтим в инвентаре верёвку (Rope).
После выполнения этого действия на верстаке для луков и стрел появится соответствующие рецепты. Накапливаем 10 единиц дерева и созданную ранее верёвку для крафта первого дальнобойного лука. Учтите, что для оружия потребуются стрелы, поэтому сразу же необходимо создать кремнёвые стрелы (Flint Arrow). Для единоразового крафта четырёх таких стрел потребуется 4 единицы дерева и 1 единица кремня.
Перенесите полученные стрелы в инвентаре в соответствующую вкладку вооружения, иначе использовать лук точно не получится. Для успешной атаки нацеливаемся на врага и зажимаем левую кнопку мыши для усиления мощности стрелы. Отпускаем клавишу и наблюдаем за эффектным полётом стрелы.
Rare Drops
I mentioned some of the rare drops before but here I’ll explain each one again: Bones These drop from the Goblins (green guys who throw bones). Though there’s only a slight chance for them to drop. What can you do with them? I haven’t checked. I only got them once and didn’t have time to test it out. Chunkium Ore A rare Ore dropped only from the Big Chunk boss upon dying. Can be melted into bars and used as an alternative to Adamite to make weapons, tools and armor. Can also be used to craft Chunkium Hammer (with a Hammer Shaft). It is the strongest weapon in the game, able to 1-hit most enemies. Has a damage output of around 100. It’s hard to craft because both Hammer Shafts and Chunkium Ores only drop from buffed Big Chunks, and it’s not a 100% drop. Credit for this info goes to FurryPaldin – Gadius. Thanks Gladius! Hammer Shaft Also drops from Big Chunk but only with a slight chance. Used to make the Chunkium Hammer. Electricity Ball Drops from Lightning Dins (Daves). Water Ball Drops from the Blue Dinos (Blue Daves) that shoto projectiles. Wyvern Claws Dropped from the Wyverns (Flying Dragons). They are used to craft Wyvern Daggers. Credit goes to Gage @ss Pack for this one. Wind ball Dropped from the Wyverns (Flying Dragons).
Powerups
Powerups are found in Chests. They provide the player with increased stats or special abilities like Double Jump. The powerful ones are found high tier chests while the less powerful ones are found in low tier chests or the unlocked ones. There are four types of chests: Old Chests 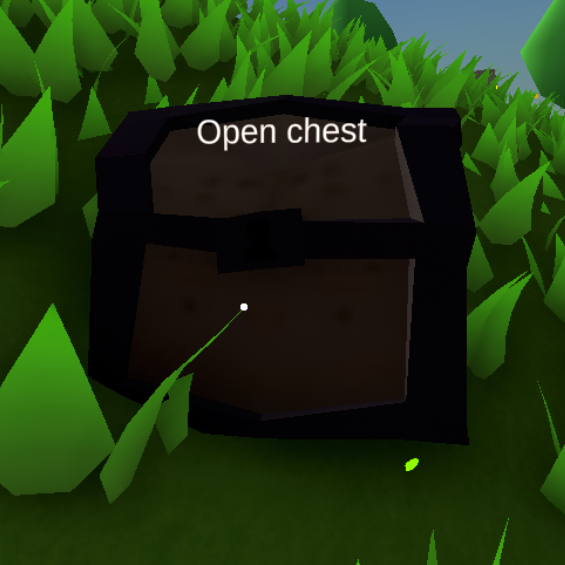 Cost: Nothing. They are unlocked by defualt. They drop Low-Medium tier Powerups. Wooden Chests
 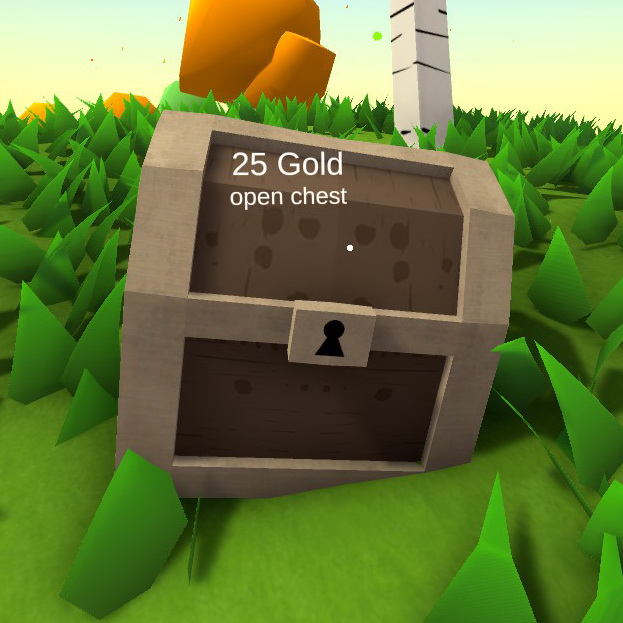 Cost: 25 Gold They drop Low-Medium tier Powerups. Blue Chests
 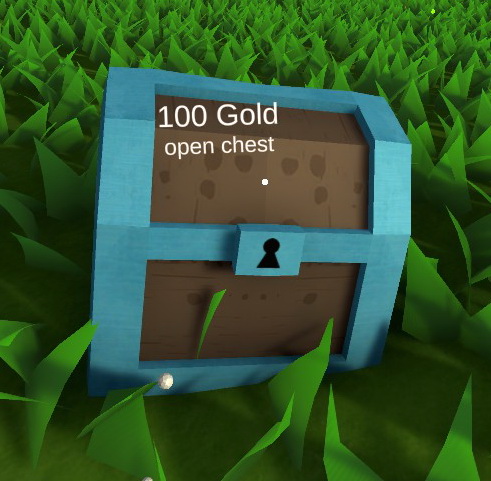 Cost: 100 Gold They drop Low-High Tier Powerups. Orange Chests
 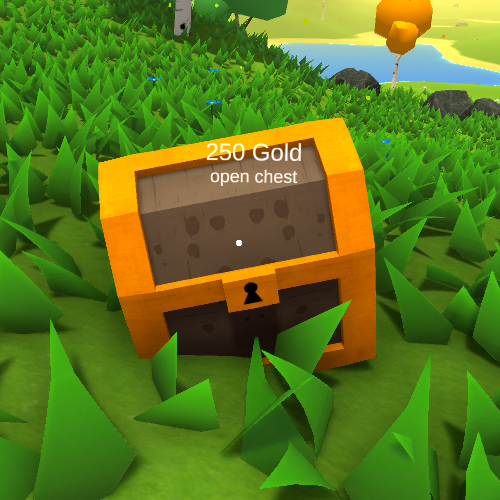 Cost: 250 Gold They only drop High Tier Powerups.
Low Tier
Sneakers Tier: Low Abilities: Increase Movement Speed Broccoli 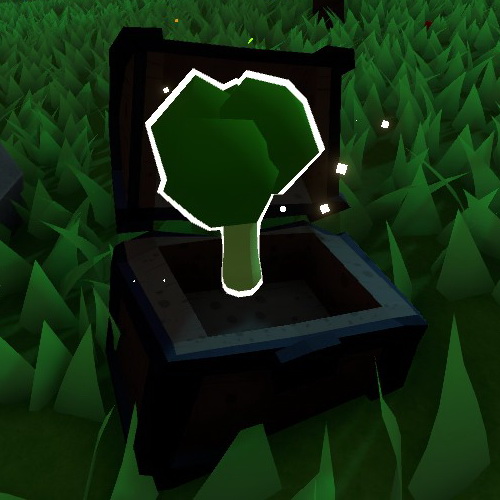 Tier: Low Abilities: Add Health Regeneration to Player (one of the best things you could get). Red Pill
 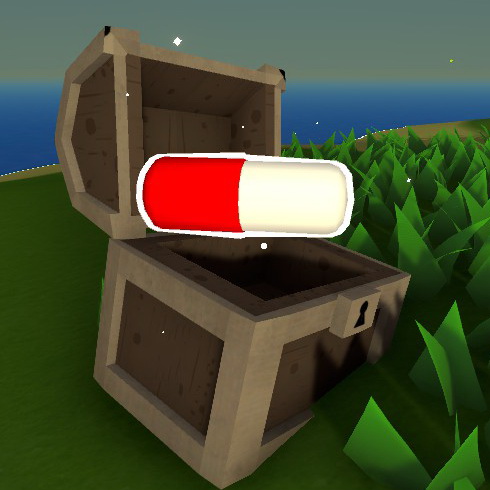 Tier: Low Abilities: Increase Max Health by 10 points Blue Pill
  Tier: Low Abilities: Add 10 points of Shield value to Player’s Health Jetpack
 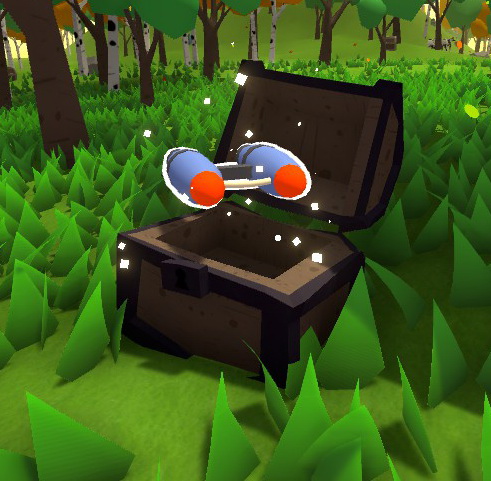 Tier: Low Abilities: Increases Jump Height Peanut Butter
 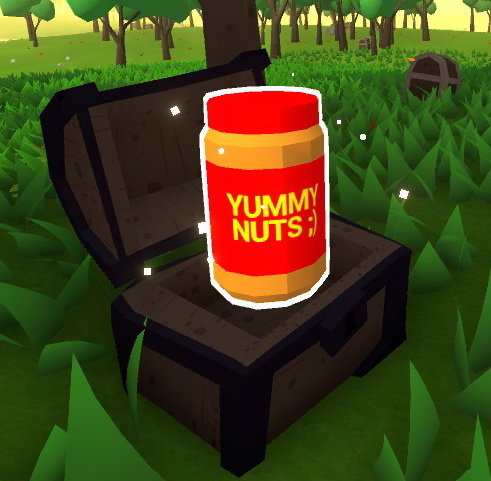 Tier: Low Abilities: Improves Stamina Dumbell
 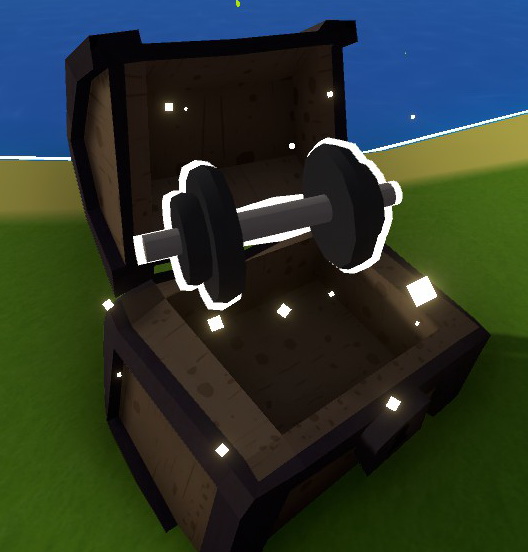 Tier: Low Abilities: Increase Player Strength which increases Melee Damage. Orange Juice
 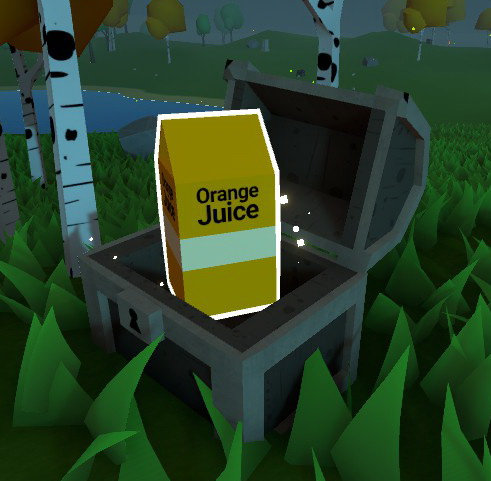 Tier: Low Abilities: Increase Attack Speed
Medium Tier
Dani’s Milk 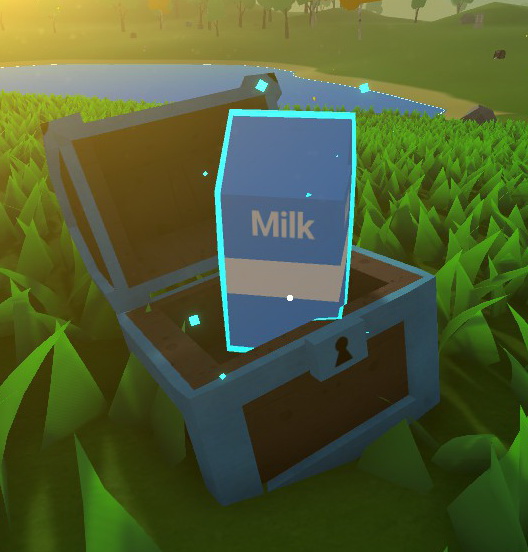 Tier: Medium Abilities: Drink up Boners! This carton of milk will make your bones strong and increase your defense! Bulldozer
 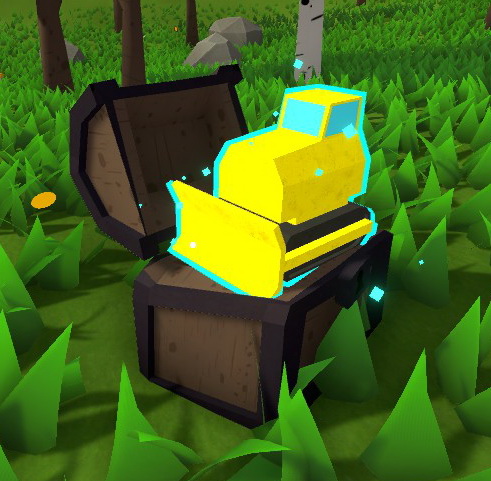 Tier: Medium Abilities: Adds a small chance to Knock Back enemies (further than usual) Jannik’s Frog
 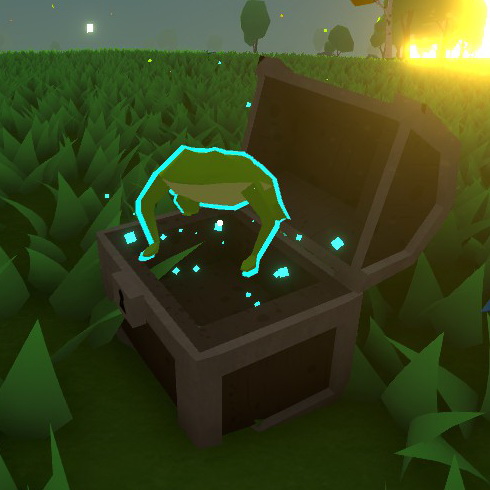 Tier: Medium Abilities: Add’s the Ability to Double Jump Piggy Bank
 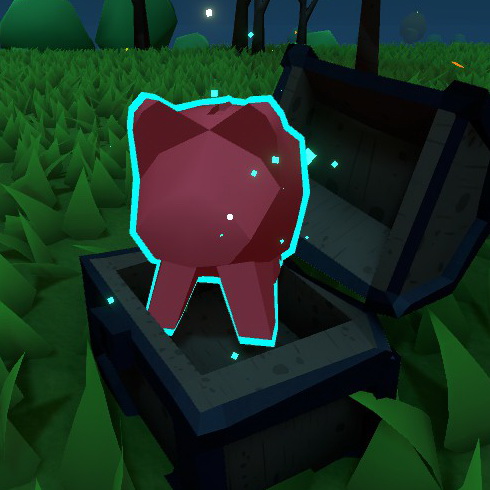 Tier: Medium Abilities: Increase Amount of Gold Enemies Drop Dracula
 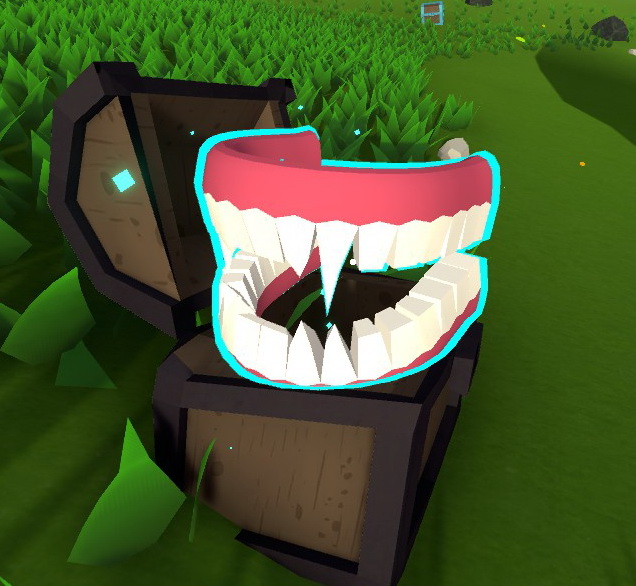 Tier: Medium Abilities: Increases Player Max HP by 1 on each kill (Cows count too). Horseshoe
 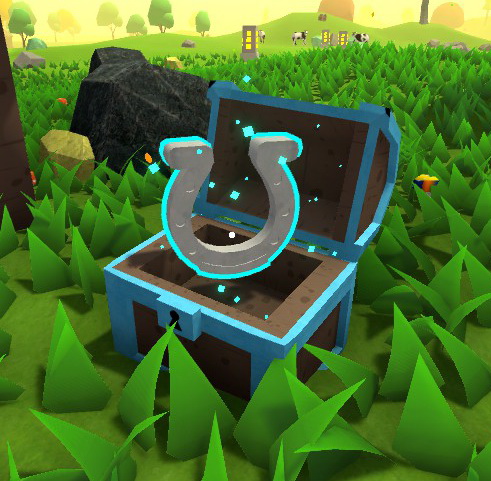 Tier: Medium Abilities: Increase chance of Critical Strike
High Tier
Wings of Glory 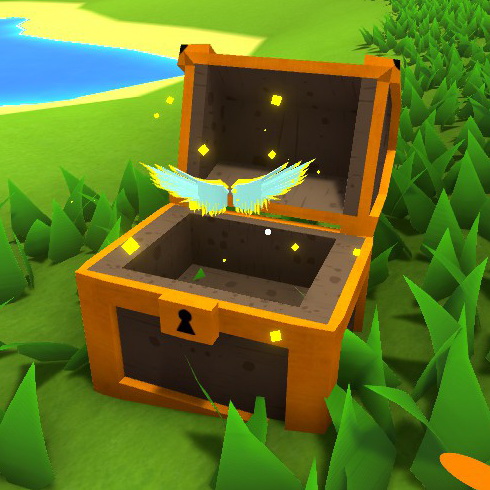 Tier: High Abilities: Deal Bonus damage while falling. For those of you who love ground slamming. Adrenaline
 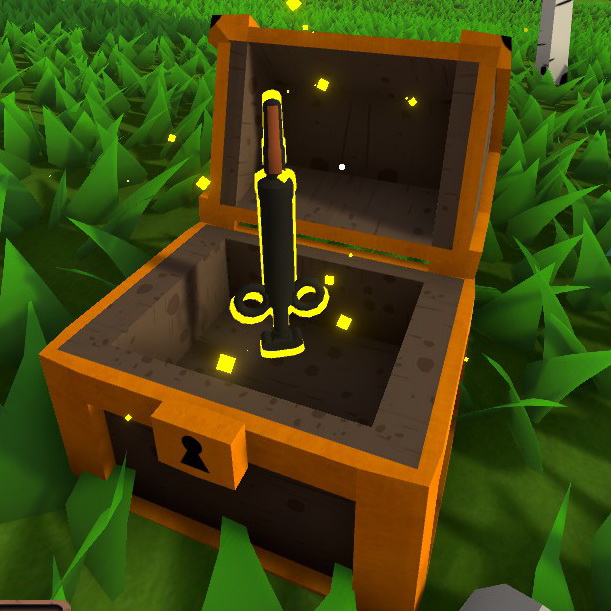 Tier: High Abilities: Increase Player’s Stats if his HP falls below 30%. One of the stats it increases is the Player’s movement speed which is great for running away. Knut’s Hammer
 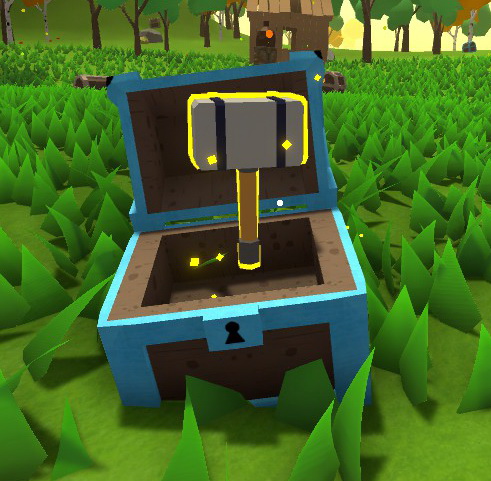 Tier: High Abilities: Adds a small chance on Attack (landing) to fire a burst of Lightning forward, dealing an areal damage to the front. Works on Resources too. Checkerd Shirt
 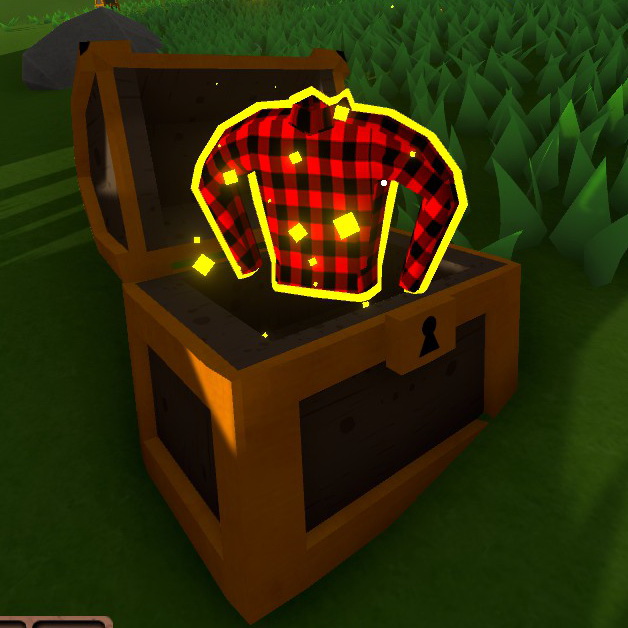 Tier: High Abilities: Increases damage dealt to resources (trees & rocks). Sniper Scope
 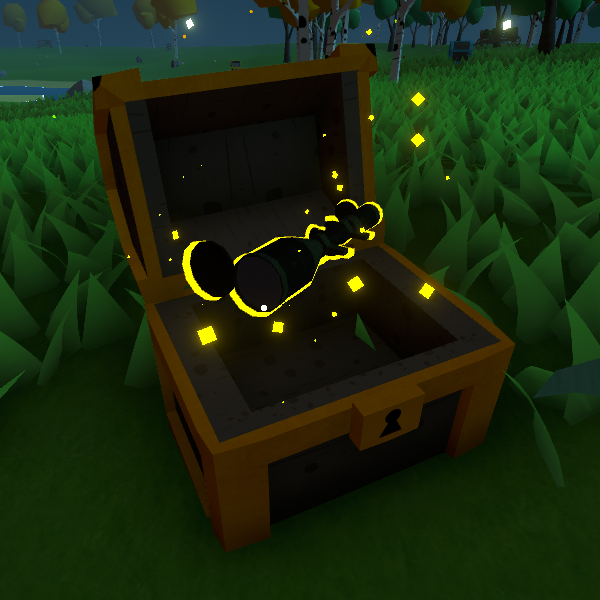 Tier: High Abilities: Add a small chance to deal super high Critical Damage. One-shotting most enemies. How high can the damage go? Highest number recorded by me has been 2061 damage. Awesome for bosses. How high can it get by stacking? Well mineman1 managed to stack 6 of them together and do 46,000 damage!
Basics
Gameplay
This game is a mix of Survival and Rogue-like Games. In Rogue-likes you start your game in an RNG based level (or static level with RNG items) and have to either get to the end or as far as you can. If you die, you go back to the start. If you win, you go back to the start. That’s the simplest definition of Rogue-Like for ya! In this game, you will gather resources and materials, craft and build like Survival Games. But you will you can only do this by day. Because as night, enemies spawn and attack indefinitely until dawn. So you gather and craft by day and fight by night. Simple as that. At first, you don’t have all the blueprints for crafting unlocked. But whatever new material you pickup, the Blueprints for that material are automatically unlocked for you. There are four main resources you gather:
- Wood
- Rocks and Ores
- Food
Basics
Controls
Perhaps one of the most vital elements of the game is to first get to grips with the controls, becoming familiar with these is a great way to prepare yourself for movement during later Bossfights.
| Default controls | |
|---|---|
| Control | Default keybind |
| Move Forwards | |
| Move Backwards | |
| Move Left | |
| Move Right | |
| Jump | |
| Sprint | |
| Interact | |
| Inventory | |
| Map | |
| Attack / Consume | |
| Place |
Game basics
This section covers some very basic tips to start off a player’s adventure.
- As soon as you spawn into a world, you will want to start progressing immediately. Start this by picking upa Rock, this can be used to mine plain Trees in order to harvest Wood.
- Enter the inventoryand craft and place downa Workbench. This crafting station provides crafting capabilities for most early-game items. With your acquired wood, open the Workbenchand craft some basic materials, such as a Wood Pickaxe, Wood Axe and Bowls for later use.
- Scavenge around to try find Foodstuffs on the ground, try to gather a good number of these, as running out of hunger can disable sprinting and jumping. Hold downto consume these.
- Look around to try find Huts, Caves and Wooden Carts. These can be extremely useful to provide the player with early equipment, such as Coins, Weapons and Foodstuffs.
Upgrading
As soon as the player has early-game items. The player will need to start gathering better materials to become stronger. Upgrading is an essential part to overcome future Bossfights.
- With enough Coins, start opening Loot Containers for Powerups. These are extremely beneficial to the player, providing bonus life, health regeneration, strength and abilities.
- Locate Birch Trees to harvest Birch Wood with a Wood Axe. This new wood provides many Powerups.
- Locate Caves or areas with great Ore Outcrop density, with a Wood Pickaxe, start by mining out Rock, Iron Ore and Coal from their corresponding outcrops. Use these materials to craft a Furnace at a Workbench, and start refining the Iron Ore into Iron Bars. You will need to do this for all Ores you come across.
- With the acquired Iron Bars and Birch Wood, craft an Anvil at a Workbench, you will want to try to craft a Steel Pickaxe, Steel Axe and optionally a Steel Sword and Steel Armor.
- Use these new items to harvest new Ores and Wood types, repeating the process to craft better equipment.
- Start interacting with Shrines. These will summon Buff Enemies, however, in return, grant the player with Powerups, Item drops and Coins.
- Try to craft more complex foods through a Cauldron, an easy way to do this is by cooking Raw Meat, dropped by Cows. These Foodstuff are more sustainable and will keep the player’s energy for longer.
- With any spare Coins, the player may wish to locate a Trader Camp in order to trade with Woodmen, this is an easy way of attaining gear which otherwise may be difficult to get. Sell cheap items like Wood to the aforementioned Woodmen to achieve this easily.
Enemies
Although the player won’t meet every enemy straight away, they will encounter more monsters as they progress and the nights quickly wear on. These creatures will also become more dangerous overtime as they gain more health and deal more damage. It’s good to know their general gimmicks so that you are prepared for the next threat.
| List of Enemies | |||
|---|---|---|---|
| Enemy | Starts Spawning Naturally On | Description | Weakness |
| Dave | Day 0 | Typically the first enemy the player encounters. Very weak. Can be found roaming at any time of day. | None |
| Goblin | Stronger than Dave. Has a ranged and melee attack. Can sometimes be annoying or even fatal, if one is not prepared, in groups. | ||
| Wolf | Day 1 | Extremely fast. Can easily overpower players that aren’t prepared, especially with other enemies distracting them. | Fire |
| Small Chunk | Slow and tanky. Can distract players from other threats. Has a melee and ranged attack. Use a Pickaxe, as they are weak to blunt weapons. | Blunt | |
| Fire Dave | Day 4 | Stronger variant of Dave. Shoots powerful Fireball projectiles. Take care when disposing of this elemental beast. | Water |
| Lightning Dave | Day 5 | Stronger variant of Dave. Shoots powerful Lightningball projectiles. Take care when disposing of this elemental beast. | Fire |
| Water Dave | Day 6 | Stronger variant of Dave. Shoots powerful Waterball projectiles. Take care when disposing of this elemental beast. | Lightning |
| Wyvern | Night 7 | A flying fiend that shoots deadly Windballs at anyone who dares approach. Use a ranged weapon or gather Janniks Frog or Jetpack Powerups to combat this threat. For whatever reason, Wyverns cannot damage workbenches. Use this to your advantage! | Lightning |